Epson XP-205 Scanner in Windows 8.1 – How to get it back to work

Now it’s time for a Epson XP-205 Scanner to work with Windows 8.1

It took me a while now to get the XP-205 scanner component to run on my new Windows 8.1 via WiFi:

The problem is, that when you install the scan software, you might get a communication error telling you that the scanner is probably not connected or turned off. Both of course is not the problem.

So how you get it online in Windows 8.1:

  1. First install the Epson Scan software that you can obtain directly from epson (german version link).
  2. Open the scan software and verify that you (still) get the error.
  3. epson-scan-settings-1
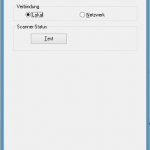
Then change to the Windows-Tile screen (just hit the Windows-Key on your keyboard) and type “Epson Scan”. A list should appear that shows the Epson Scan entries. One of them should be “Epson Scan Settings” (german: Epson Scan-Einstellungen).
  4. Now comes the tricky part:If you work as an administrator (which you shouldn’t do usually), just open the Epson Scan Settings tool. Otherwise right-click the Epson Scan Settings tool and start it with administrator privileges. This is very important! Otherwise you won’t be able to do the next step as an important part is greyed and thus unavailable!
  5. You should see the settings window with “Connection local” selected.
  6. epson-scan-settings-2Hit the “Network” button and then hit the “add” button below the Networkscanner address field.
    If this button is disabled, you probably do not run the program with admin privileges.
  7. Add the Scanner’s IP and give it a name.
  8. Hit the Test button – it should work now!

epson-scan-settings-4
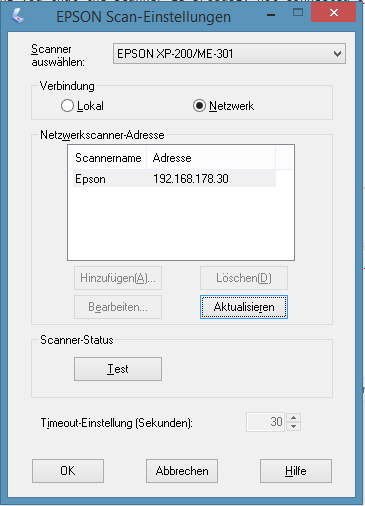
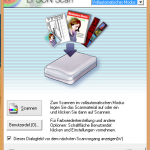
The scan software should work now. I first had some issues that I also had to run it with admin privileges. Sometimes I could start the scanning software, showing the correct user interfacec but it only scanned a very tiny part of the physical scan area (VERY strange).

So if you still experience some issues: Try restarting the computer first! If this doesn’t work, try starting as administrator.

Update: The Scan software surprised me today with a message similar to  “ah no – I won’t scan today”. So I

  • uninstalled the scan software. Well I tried, the files were still in the windows directory.
  • let the Software updater update the firmware of the device
  • reinstalled Epson Scan

And – suddenly everything is just fine.

Fix Twitter share button in WordPress’ Huge-IT Share buttons

I just tried the Huge-IT share plugin for wordpress and realized that the twitter share button seems to have a bug: When sharing, the tweet will not link back to the URL. Not cool :-/

Fix:

changed the file (via edit plugin): wp-share-buttons/Front_end/share_front_end_view.php

case 'share_twitter_button':
 $link= 'https://twitter.com/intent/tweet?url=http%3A%2F%2F'.$linkthispage.'&text='.$str;

Now the URL is prepended with http and thus displayed in the twitter share-dialog as well. Mission accomplished.
(And Huge-IT is also informed about the bug + fix)

Have fun and a happy new year

OpenOffice vs LibreOffice on Windows 8.1

Just recently I wanted to install Libre- or OpenOffice on my Windows 8.1 machine. Google wasn’t much of a help: there are a lot of pages comparing OpenOffice with LibreOffice. Yet most of them conclude with a “it doesn’t matter which one you choose.”

But there is a quite relevant issue that is not covered in all the pages:
If you’re not working with administrator priviledges (which is recommended), LibreOffice is the way to go! OpenOffice installs the menu entries etc into the administrator account. This isn’t a major issue – You could easily add the menu entries manually.

Well or just use LibreOffice, which installs correctly – no manual intervention required!

Compiling Cascading: FAILURE: Build failed with an exception.

Today I ran into a really stupid error message when I tried to recompile cascading-jdbc:

Evaluating root project ‘cascading-jdbc’ using build file ‘/home/…/cascading-jdbc/build.gradle’.

FAILURE: Build failed with an exception.

* Where:
Build file ‘/home/…/cascading-jdbc/build.gradle’ line: 68

* What went wrong:
A problem occurred evaluating root project ‘cascading-jdbc’.
> Could not find method create() for arguments [fatJarPrepareFiles, class eu.appsatori.gradle.fatjar.tasks.PrepareFiles] on task set.

* Try:
Run with –stacktrace option to get the stack trace. Run with –debug option to get more log output.

BUILD FAILED

Total time: 5.355 secs

Solution

Check your gradle version … I ran a brand new Ubuntu with the shipped gradle version 1.4. Well the cascading readme states that gradle 1.8 is required … and it really is.

Feedly being DDoS’ed – Open communication leads to a boost in Pro Accounts

You might have heard that the company providing Feedly (a news aggregator application) is currently being extorted money by attacking the website. The attackers are DDoS’ing the website to make website and the complete webservice unavailable until Feedly pays money.

While Feedly still refuses to pay ransom they’re battling the third day against the attacks. While DDoS attacks are not a novel crime in the battlefield called internet, Feedly decided to communicate openly about the situation.

The Feedly community obviously rewards the open communication: In a tweet, Feedly announced that “the rate of Pro sign ups has doubled over the last 3 days”. Feedly: Keep up and stand your ground!

IntelliJ IDEA and Scala being awfully slow on Windows 8.1

At work we are working mostly in Scala and most of us are using IntelliJ IDEA for coding. The choice of the operating system is up to the developer. As I am quite convenient with Windows (and use MS Office quite often), I am a happy Windows 8.1 user (btw: who the hell needs a start button when you have the windows key!? Anyways … different story).

The Problem

After a while when I started a Scalding project, IntelliJ became very slow and often turned to be non responsive for some seconds about once per minute. So over all it was a very inconvenient and unproductive situation.
Continue reading IntelliJ IDEA and Scala being awfully slow on Windows 8.1

“Easy going” vs “Taking care”

Freitag Abend. Heimfahrt in der BOB (BayerischeOberlandBahn). Wochenende here I come!

In Bad Tölz (eine Station vor meinem “Zielflughafen”) höre ich “Hausham? Da sind sind im falschen Zug.” (Hätte man vor einer halben Std in Holzkirchen umsteigen müssen). Ich denke mir “Arme Sau – jetzt fährst erst mal wieder zurück – oder du kennst hier jemanden der dich fährt – Ist mir aber wurscht – denn ICH bin gleich daheim. HA-HA!”.

Der Zug steht noch – ein junges asiatisches Mädchen das gerade ins Teenageralter eingetreten sein muss läuft etwas hektisch herum und spricht mich dann an “schuldi-gung – Hausham?”
Ohoh. “Hm tut mir leid, falscher Zug, steig schnell um in den Zug am anderen Gleis. Du musst zurückfahren.” Verzweifelter Blick ihrerseits. “ik ver-stehe nicht?”
Oh verdammt – kurzer Versuch in Englisch – nada. Noch maximum 2-3min bis der andere Zug fährt. Oh – scheiße – das bekomme ich jetzt nie erklärt. Die Hoffnung stirbt zuletzt: Noch ein Versuch es ihr zu erklären. Auch die Taxioption versteht sie natürlich nicht.

Option A) Schultern zucken, mich nicht weiter kümmern, das Mädel bis nach Lenggries fahren lassen (wo sie nicht weiter von Hausham weg sein könnte) und gleich daheim sein (also ich – sie sicher nicht). Ist ja schließlich nicht mein Kind.
Option B) Zusammenpacken, das Mädel in den anderen Zug setzen und hoffen, dass mich irgendwer fahren kann (oder dass diesmal wenigstens Taxis da sind) weil MEIN Zug dann ganz sicher weg ist.

Continue reading “Easy going” vs “Taking care”

“bad subifd directory” Replacing/removing bad SubIFD

Handling bad SubIFD entries in photos you want to geo tag / the problem

I just converted some of my RAW photos in RawTherapee and polished them in Photoshop CS. Of course I also wanted to GeoTag them (using GeoSetter) before putting the images in my archive. Fortunately, a GPS point was found in my trace for all photos. Unfortunately, I couldn’t write the Exif-GPS position due to a “bad subifd directory”. That’s what exiftool (which geosetter uses) tells me.

So – how to get the geo information into exif – or how to get the bad SubIFD directory out?

The solution:

In the end the issue was rather easy to solve:

  1. copy your images to a linux machine (or vm or whatever)
  2. copy all images to a directory “conv” AND in parallel to “conv2
  3. enter “conv2
  4. remove all exif information from the conv2 images by
    find ./*.jpg -exec exiftool -exif:all= {} ;
  5. enter “conv1” & copy the exif information (except SubIFD) to the cleaned images in “conv2” by
    find ./*.jpg -exec exiftool -tagsfromfile {} -exif:all --subifd:all ../conv2/{};
  6. you’re done.
  7. (fire up geo setter and geo tag your photos)

Be happy!

Convert Mercurial repository to Git

I have converted yet another googlecode Mercurial repository to Git – and as it took me (again) a bit too much time, here is my recipe:

Prepare

Log into a Linux shell (Windows will hardly work – at least it didn’t work for me). If you don’t have some remote shell, download an Ubuntu VM and fire it up (you might need to install VirtualBox if you haven’t installed it already).

Check out your HG repo:

hg clone https://code.google.com/p/MyHgProject/

Check if you have to remap some author information:
hg log MyHgProject

If you want/have to remap, simple create an author map file
oldemail@example.com=Firstname Lastname

Convert

Get fast-export and convert your repo:
git clone git://repo.or.cz/fast-export.git
mkdir new_git_repo
cd new_git_repo
git init
/path/to/hg-fast-export.sh -A ../authormap -r /path/to/MyHgProject
git checkout HEAD

Push

Now change the source setting in your google code repository to git and push the local codebase:
git remote add origin https://code.google.com/p/MyHgRepo/
git push --all

At this point, your upload might fail with something like “error: RPC failed; result=35, HTTP code = 0”.
This can happen if your upload takes too long and this is a documented bug.
I simply solved this issue by pushig the git repo from a shell with a fast enough upload speed as my local connection obviously was too slow.

Wiki

Now you might realize that you have “lost” your complete wiki – don’t worry, it’s still there!
Switch back your repo setting to Mercurial and repeat the process for your wiki which you can usually find at https://code.google.com/p/yourProjectName/source/checkout?repo=wiki

That’s it. You should now be ready to use Git!


Thanks to following sites hedonismbot, scrambled tofu